Although 3D Inspection System Software is not an email client, it does have the ability to email items directly to contacts by means of your own SMTP email account, provided it supports legacy functionality. In order to do this you must first enter your outgoing SMTP Settings.
NOTE: If your emailing service does not support legacy SSL with SMTP emailing or has special restrictions you may or may not be able to use this option, or may need to first enable special settings in or for your third-party account. 3D does not control or is not responsible for restrictions imposed by third-party services or any changes such may make in the future that may allow or prevent the option from working within 3D with their servers. One may of course also directly produce a PDF printout and simply attach that to an email in a third party service. See Delivery Options
To enter emailing settings in 3D, select the toolbar Maintain > Office Management Preferences option.
A new window will open. Select the Emailing tab.
Many email services allow standard SMTP (Simple Mail Transfer Protocol) to be used for sending email through their service. If your email supports standard explicit SMTP complicit protocols and doesn't do anything special or non-standard then you can likely use it with 3D. You would need to obtain the correct SMTP settings to use from your email provider. Many email providers have this information online. Note that many services may have more than one set of SMTP settings available. So if a certain port number doesn't work then try the alternatives the email provider might provide.
Below is a mock demonstration of how and where you might set up email in 3D.
NOTE: As newer security options change and adjust, some providers enforce newer special requirements for allowing third-party apps to send through their servers. Here are current tips for setup of two popular email services (subject to change):
- Google requires generating and using a special App Password. See https://archive.3dinspection.com/en/forums-discussion/10046-general-and-computer-hardware/738-less-secure-apps-sign-in-google-warning
- Microsoft requires opting in to use a special alternate endpoint and/or permission exceptions for mailbox designated for use with legacy SMTP options. See https://archive.3dinspection.com/en/forums-discussion/10046-general-and-computer-hardware/734-error-sending-email-unable-to-send-email-message-using-smtp-office365-com-in-area-13-failure-sending-mail
Consult your local IT if you need help with either of the above options. In general, first you'll need to determine your email provider's SMTP settings. You can search for these settings online or contact your provider for the settings to use. Once you've found your settings you'll fill them in.
In this example the SMTP Server will be: smtp.gmail.com.
The Login Name would be your account email address.
The Password is your email password, or in the case of a gmail setup your App Password you generate for use with 3D or this computer (see link above).
The Email User Name is what some email services show as the sender. Although not all email services use this it's still a good idea to fill it out. Typically it will be your name or your company name.
The Return Email Address is your account email address.
The SMTP Port settings may vary. Typically Gmail uses port 587 or 465 with SSL enabled. Note that if your email settings mention TLS encryption that is also a type of SSL and SSL would be enabled. In this example we will be using port 587 with SSL enabled. If these settings don't work for you then you may want to try the other ports with and without SSL enabled. See end of the article for further troubleshooting suggestions.

Now that the basic emailing is setup you can click OK to save and a test email can be sent. Before doing so you may also want to setup email messages by selecting the email messages tab.
These are optional default messages for the body of your emails to save time when you're emailing an invoice, inspection report, or document.
In this example we'll fill out a message for sending an invoice for a receipt. Whenever you mark an invoice as paid in 3D it automatically puts paid on that invoice turning it into a receipt. We'll start our message by typing:
Dear
Then we'll use the Insert a Merge Field button on the top toolbar to select Client First Name and Last Name so the clients information is merged in from the job.
Then we'll type the rest of our message:
Here is your receipt for the inspection at
Then we'll use the Insert a Merge Field button again to insert the job site address.
Once that’s done you can fill out the other 2 default body messages if desired. I've filled them out as demonstrated below.
Now that we've finished setting up our email settings we can test sending an email. It's a good idea to test sending an email to yourself for the first setup as opposed to actually sending it to a client.
We'll send an invoice/receipt email in the below example. To start you'll need to select a job and select the edit button at the bottom right.
Then we'll select the Email button at the bottom right.

A new window will open. All the contacts attached to the job and the inspector assigned to the job will appear automatically as long as the email is filled out for those contacts. You can select which contacts you want to receive the email.
You can also specify additional email addresses
If you want to receive the email as well then you can put your email in the Blind Carbon Copy (BCC) field. 3D will automatically remember this for next time.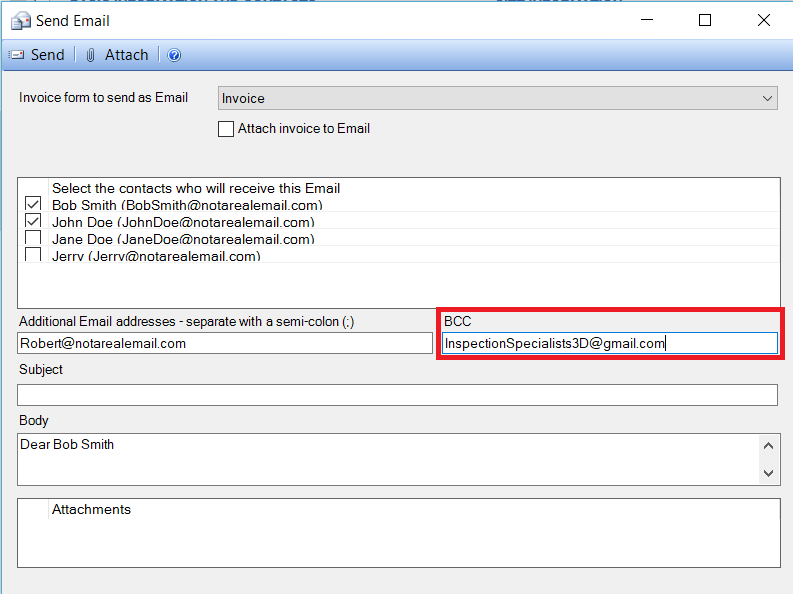
Next you'll want to add a subject for the email. In this example the body of the email came from our default message we set up earlier.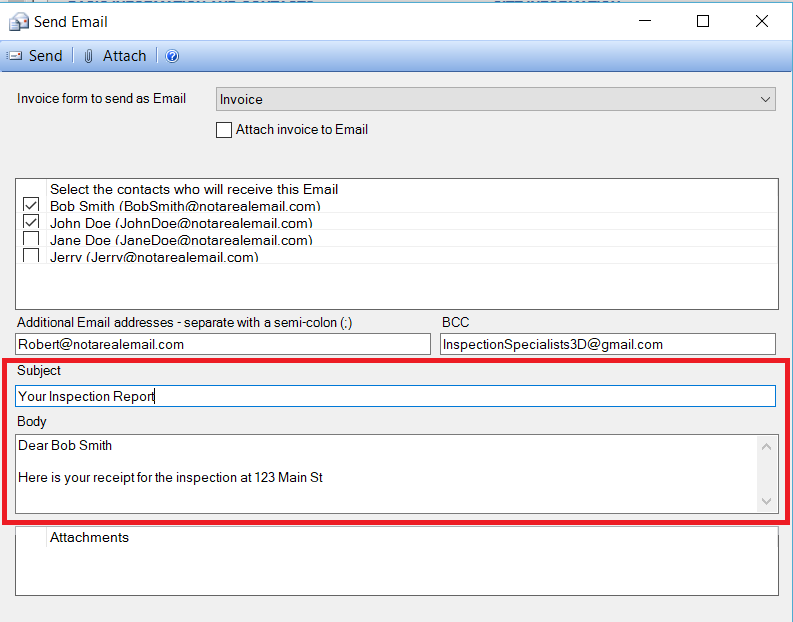
Once all of that is done select send at the top left.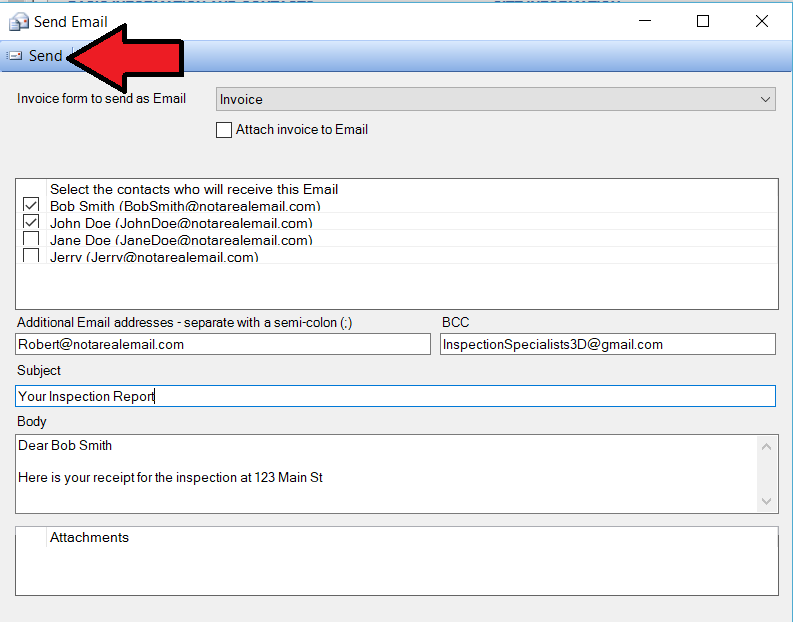
Next we'll do an example of emailing an inspection report. Open a report in report writer. Then select the print button on the top toolbar.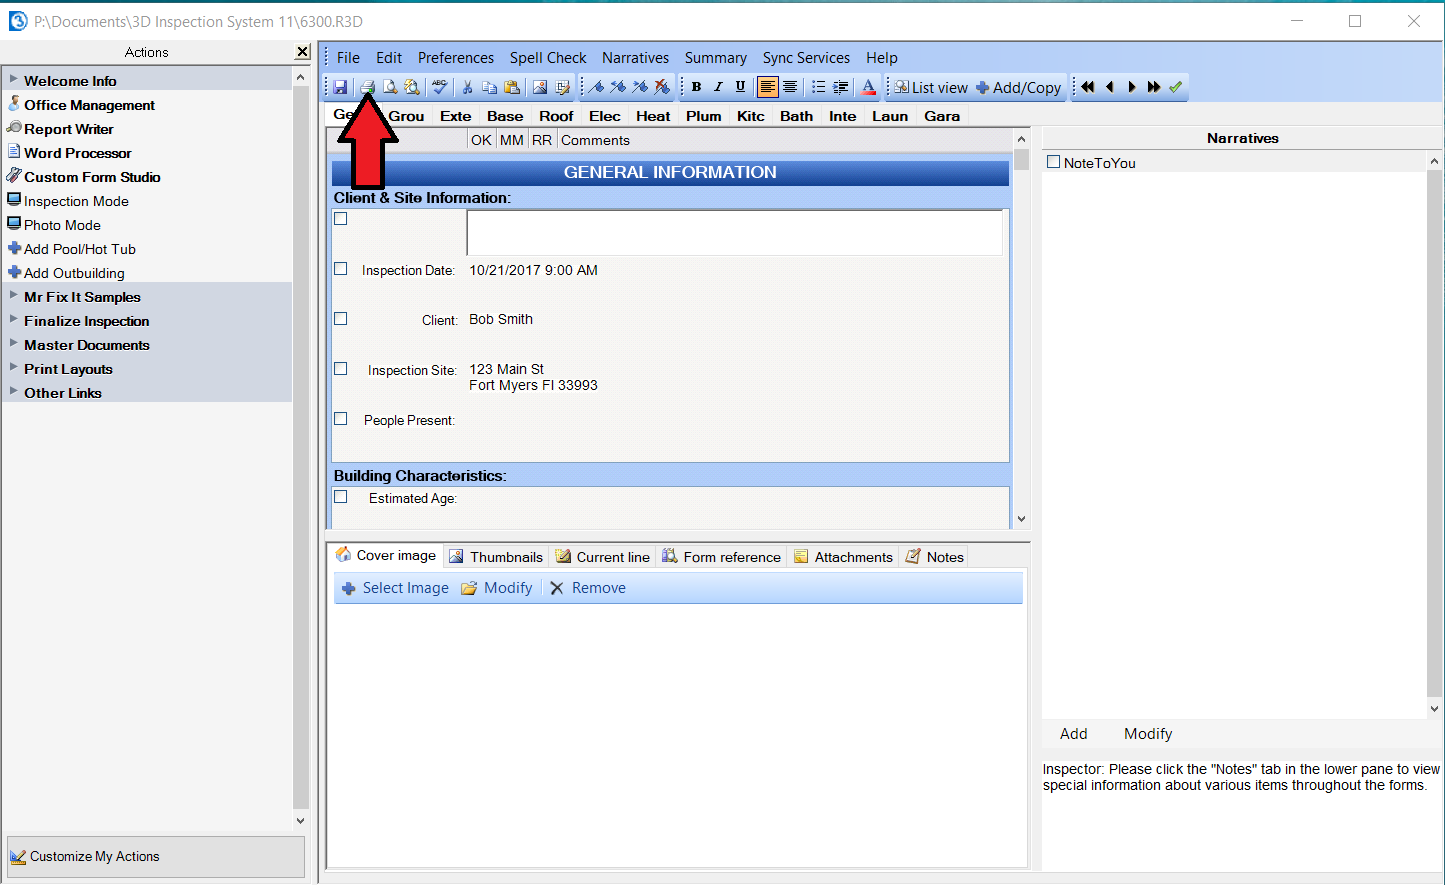
From the drop down for the Print to option we'll select Send as Email.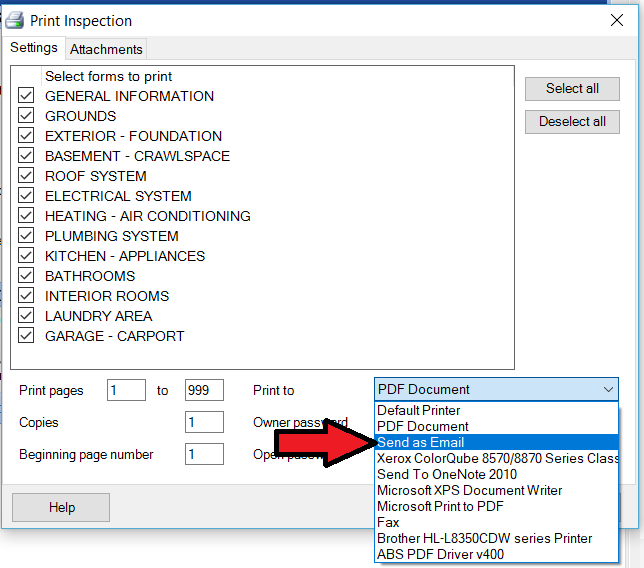
Then select the print button. We'll get an email window just like previously when we sent out an invoice/receipt email.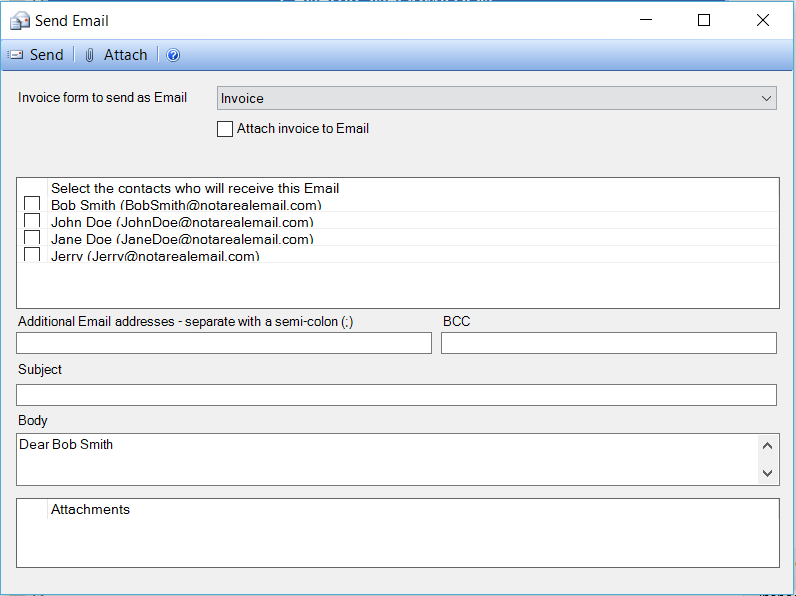
In this case you can also choose to attach the invoice to send with the report if desired.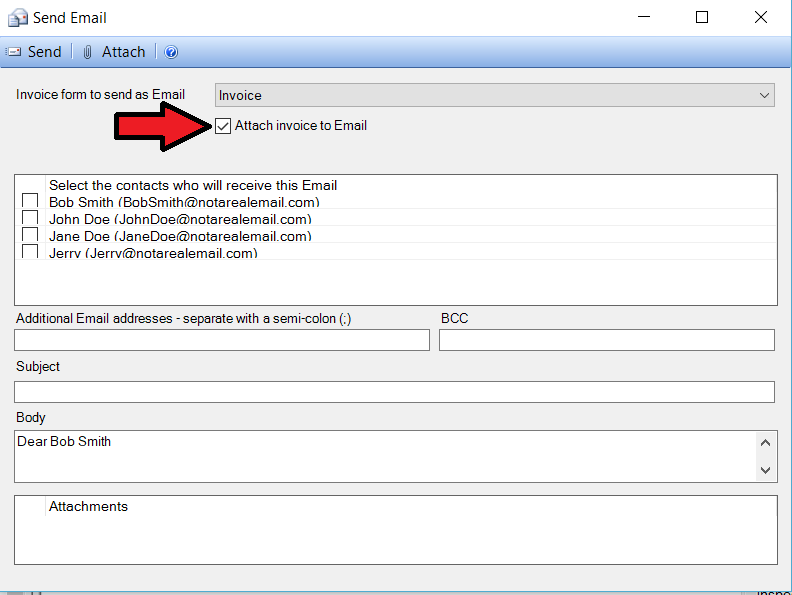
Once you're done filling out the subject, body, and other information as needed then select the send button. For further email setup information and a mock entry of settings see our YouTube video: Email Setup in 3D.
Email Troubleshooting:
If email was working and suddenly stops, or appears to be set up properly and you've confirmed with your email service provider that the settings you entered in 3D are correct but it still isn't working:
1. First try directly logging into your email provider and verify that your login hasn't changed or been updated and you need to also update that in 3D. It's common to change a login password for an account and and forget to update it in your 3D email settings. Also make your settings were put in correctly. A common mistake might be entering a comma instead of a period, or an accidental space entered before or after your user or password information.
2. You may find helpful tips or information in email tagged articles and posts: https://archive.3dinspection.com/en/tag/7.html
3. Try temporarily turning off your firewall to see if it's causing a problem. The default firewall is the Windows firewall. https://support.microsoft.com/en-us/help/4028544/windows-turn-windows-firewall-on-or-off If the firewall is the problem then you may need to add an exception for 3D. In the case of Windows Firewall it will usually block 3D from sending email if the internet network you're connected to was set to public instead of private.
4. In other cases antivirus or third-party security apps might take control of firewall settings and block the connection so you may want to try temporarily turning that off as well.


 Need Support