If you want to easily add signatures to reports but do not want to add it permanently to a particular form group (as discussed in another tips article), an alternate way to do that is by creating an action to insert the image as needed.
Note: This same technique also applies to other images or signatures you may use frequently that may not be specific to one type of inspection report.
To add a new action to insert a signature, first have a copy of your signature stored as a standard image format such as jpg or bmp. We recommend tightly cropping the signature graphic to eliminate any white spaces from the edges. It is also highly recommended to copy the signature graphic into your 3D data folder, usually My Documents\3D Inspection System 11\ , so it will be neatly stored with your other data files and less likely to get moved or go missing on the computer.
Then while in your 3D Inspection System software, use the Actions pane Customize My Actions button.
Choose to Add Action.
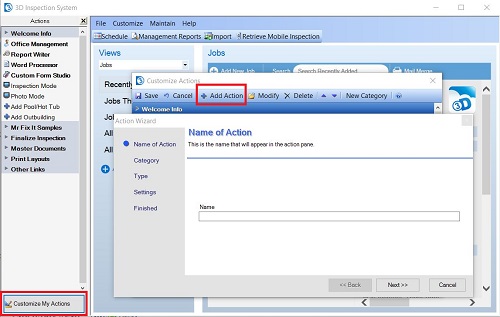
Enter a new Name for the action such as “add signature”. This name will appear on your Actions pane. If you have multiple inspectors and wish to easily insert various signatures at will, you might name it more specifically to reflect the inspector's name.
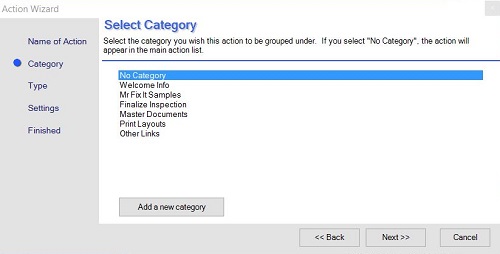
After choosing Next, select or create a category for the new action to be organized under, or No Category for it to be a main level item in your Action list, and then choose Next when done.
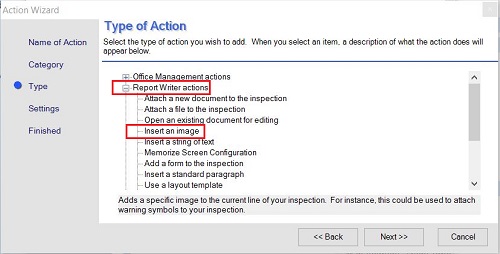
Expand the plus for Report Writer actions, choose “Insert an image” type of action, and then Next.
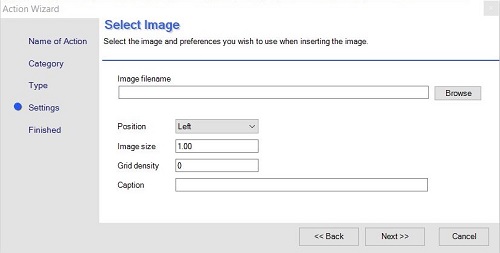
Use the Browse option for image filename to select your signature image file.
Select Next, and then Finish.
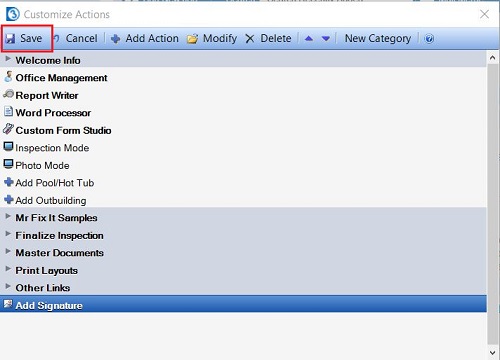
Save your new addition in the Customize Actions window.
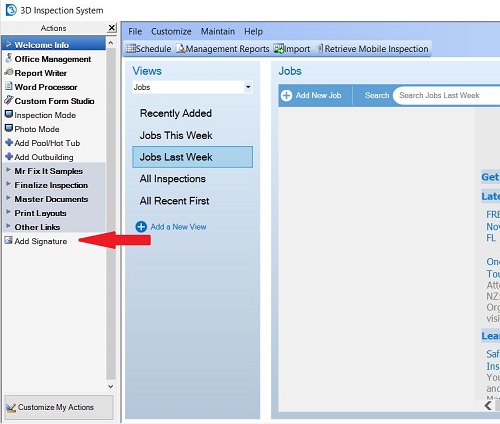
The new items appears on your Actions pane in the location and category you specified.
Now whenever finalizing an inspection in the Report Writer, you may navigate to a subheading field in your report appropriate for adding a signature, and tap the action to import the signature image right into the report!



 Need Support